Create site specific adapter
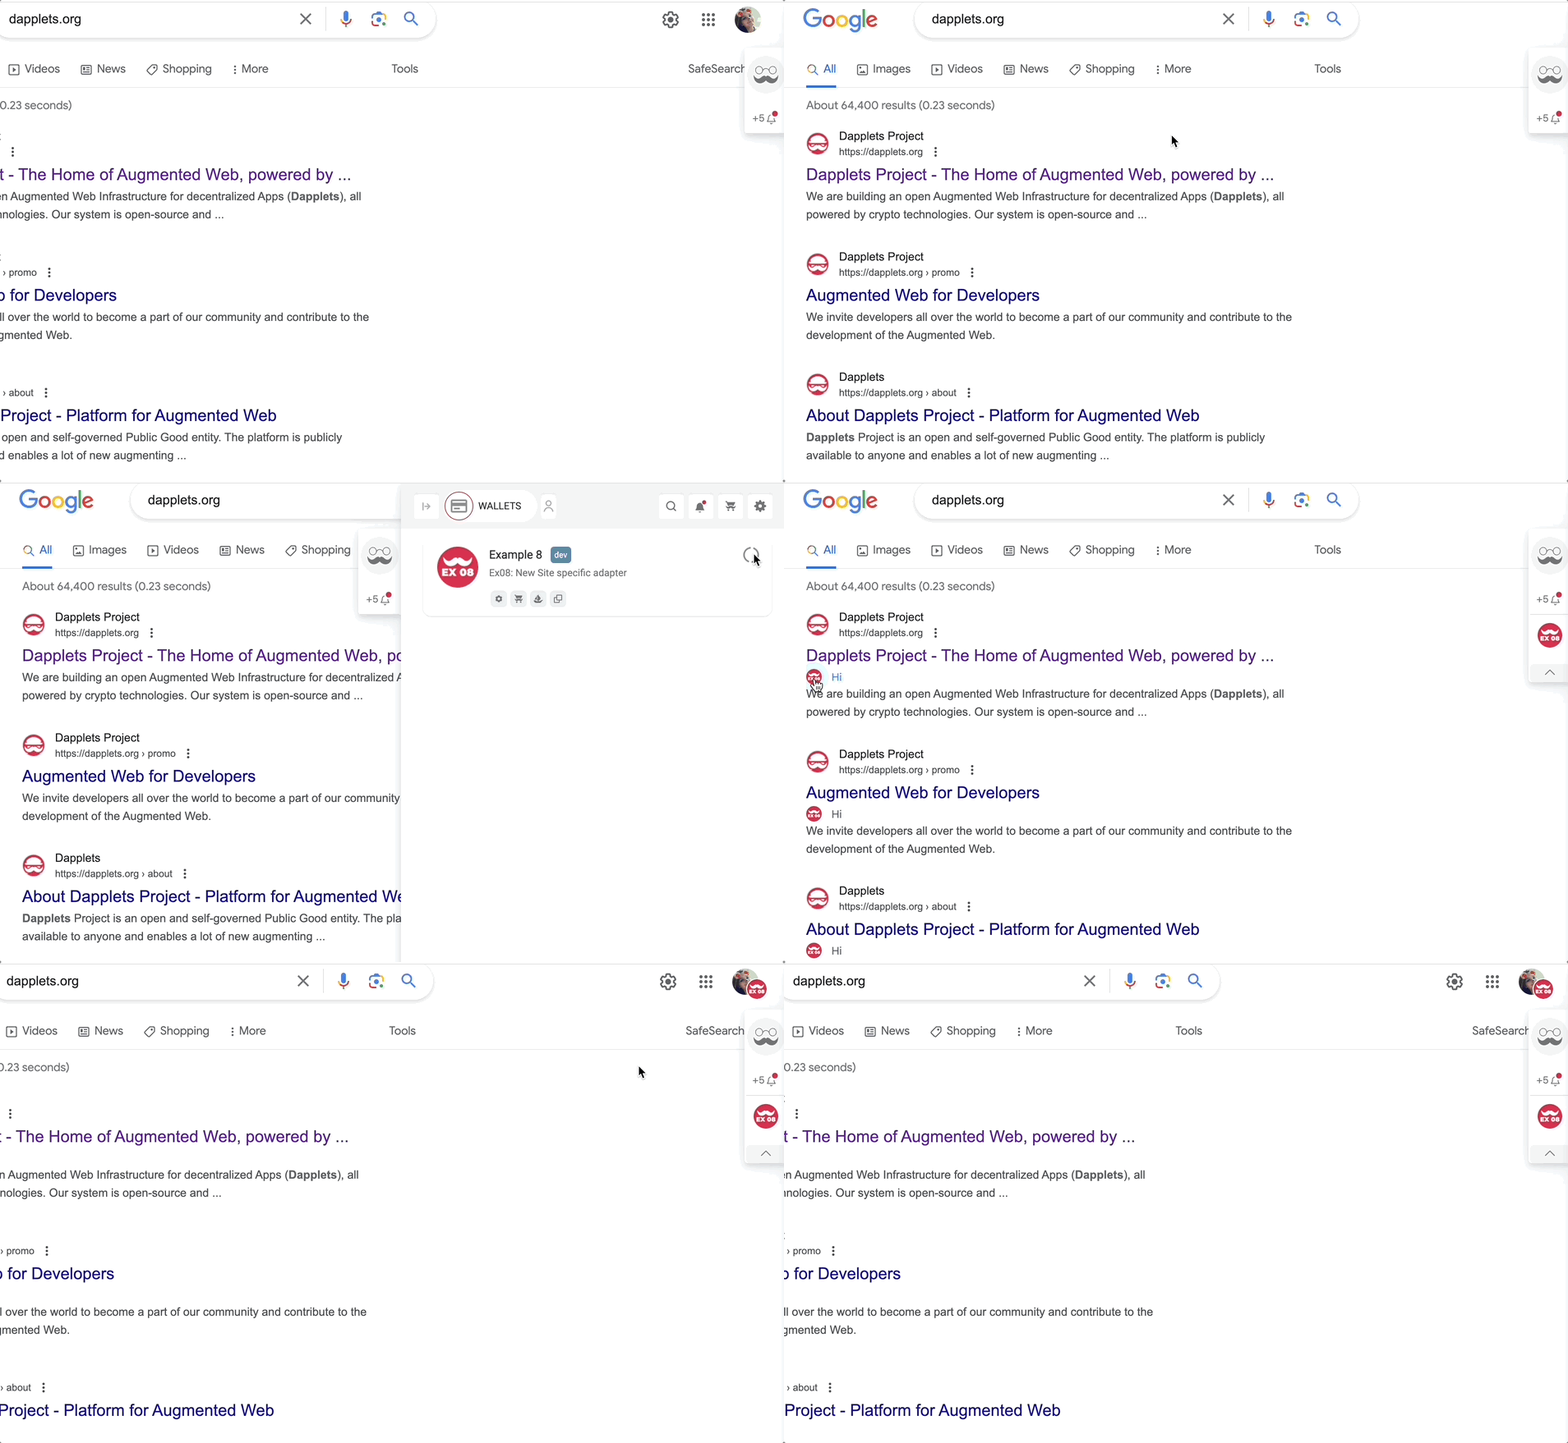
In this example we create an adapter for Google Search and a dapplet for it. The application will insert buttons to Google search results and a badge to the profile icon.
Here is the initial code for this example: ex08-new-adapter-exercise.
The adapter and the dapplet are divided into two directories: /adapter and /dapplet-feature.
Create the adapter#
I. Adapter config#
At the beginning we change the adapter template. There is a config in adapter/index.json. This is JSON with selectors that are needed to find and parse various contexts on the page. There are selectors for context data, and widget insertion points. contextBuilder defines a context information (called ctx in our examples) that widgets receive in this context types – GLOBAL, POST and PROFILE in our case.
note
Now we are talking about site-specific adapters. It means that dapplets using this adapter interact with some specific website. It also means that we should use the website's HTML structure to add our widgets to certain parts of the pages.
The idea of separating adapters from dapplets is to provide dapplets' developers with a simple interface to add their augmentationss to existing pages. This way, dapplets' developers don't need to worry about how to add their code in certain places or how to parse different blocks of information on the page. They get the template, customize it and add the behavior they need.
The goals of the adapters' developer are to create this template, define the data that can be parsed from the context, that can be useful in dapplets. Adapters' developer also need to describe exact places on the pages where the widgets will be inserted.
For example, let's look at the Google Search page. Enter some search query.
Look at the structure of the page in the browser's developer tools, Elements tab.
There you can find the block with center_col id, that contains all the main search results.
It will be our containerSelector where we will search some separate results.
Then try to pick out the selectors' chain that provides access to separate context — contextSelector. You can choose relevant selectors manually or you can left click on the element in the Elements tab and choose Copy selector. In most cases the selector has to be edited.
Make sure not to include unwanted blocks.
Using the same method define selectors for insertion points — exact places where the widgets will be placed.
There are 3 insert options: end, begin and inside. The first one is default.
!! Note that websites can be changed and you will get errors trying to get properties when the nodes will not be found.
To parse useful information from the context, we must specify queries in XPath format for the contextBuilder configuration.
It is assumed that all interactions with DOM happen in the adapters and not in the dapplets.
II. Widgets#
The next step is creating styles for widgets. We have an example of the button's style in styles/post/button.css and an example of the avatar badge's style in styles/profile/avatarBadge.css. You can change them if you want.
Paths for the styles should be specified in the config:
Widgets are currently defined in the extension. The adapter developer can style widgets for his adapter using CSS at his discretion. This can be the text of the button, the image on the icon, the choice of one of the location options, etc. The adapter developer decides what parameters to make customizable. They should be described in the documentation as follows: parameter's name, mandatory or not, data TYPE, text description. If you need to select one of several value options for a parameter, they must be listed (this can be specified in the parameter type). If the parameter type is a number, then it is recommended to indicate in which units it will be converted: pixels, percentages, fractions, etc.
Currently only button and avatarBadge widgets are available. The list of widgets is planned to be expanded in the near future.
Create the dapplet#
- Insert the correct adapter name
- Log the POST context information to the console and show an alert with the title of the search result item on the button click
- Add an avatar badge to the profile icon and log the PROFILE context information to the console
Here is the result: ex08-new-adapter-solution.
Run the dapplet:
