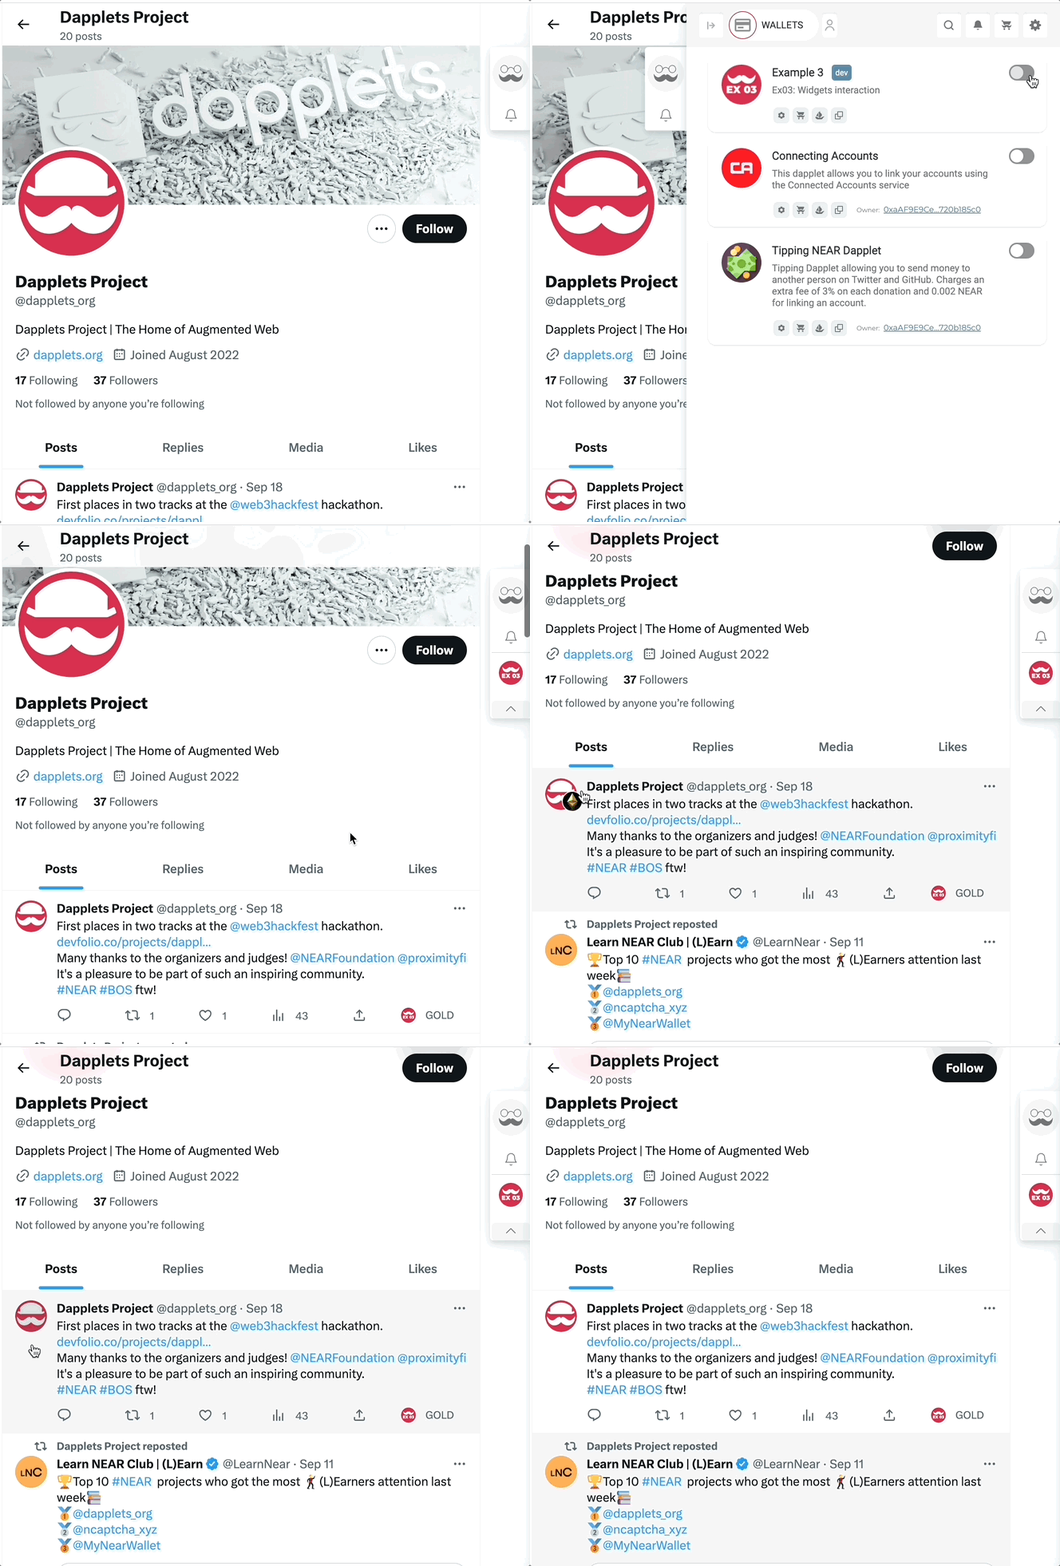
Widgets interaction

In this exercise we will add two interactive widgets to POST context.

Here is the initial code for this example: ex03-widgets-interaction-exercise.

Here is src/index.ts:

1import {} from '@dapplets/dapplet-extension'
2import EXAMPLE_IMG from './icons/ex03.png'
3
4@Injectable
5export default class TwitterFeature {
6 @Inject('twitter-config.dapplet-base.eth')
7 public adapter
8
9 activate() {
10 // LP: 1. Get the widget "avatarBadge" from adapter
11 const { button } = this.adapter.exports
12 // LP end
13 const { $ } = this.adapter.attachConfig({
14 POST: (ctx) => [
15 button({
16 DEFAULT: {
17 label: 'GOLD',
18 img: EXAMPLE_IMG,
19 // LP: 2. Toggle the state “hidden/shown” of the "avatarBadge" widget on button click
20
21 // LP end
22 },
23 }),
24 // LP: 1. Add extra "avatarBadge" widget and make it hidden by default
25
26 // LP end
27 ],
28 })
29 }
30}
tip

There is a $ Function used to access to an existing widget on the website.

It receives two parameters:

  • ctx — parsed context of the block in which the desired widget is located;
  • id — the widget ID that needs to be specified manually.

$(ctx, 'element_id') returns the me object we used in the previous exercises, but for the desired widget.

Use it to change the state or parameters.

1// Changing the state
2exec: () => ($(ctx, 'another_el_id').state = 'SECOND')
3
4// Changing the label
5exec: () => ($(ctx, 'another_el_id').label = 'Hello')

Let's get the widget avatarBadge from the adapter

const { button, avatarBadge } = this.adapter.exports

Add an extra avatar badge to POST and make it hidden by default.

1POST: () => [
2 ...
3
4 avatarBadge({
5 id: 'badge',
6 initial: 'DEFAULT',
7 DEFAULT: {
8 img: BADGE_IMG,
9 vertical: 'bottom',
10 horizontal: 'right',
11 hidden: true,
12 exec: () => console.log(ctx),
13 },
14 }),
15],

With a button click, toggle the avatarBadge’s state - "hidden/shown".

exec: () => {
$(ctx, 'badge').hidden = !$(ctx, 'badge').hidden;
},

Result:

1import {} from '@dapplets/dapplet-extension'
2import EXAMPLE_IMG from './icons/ex03.png'
3import BADGE_IMG from './icons/gold-eth.jpg'
4
5@Injectable
6export default class TwitterFeature {
7 @Inject('twitter-config.dapplet-base.eth')
8 public adapter
9
10 async activate() {
11 // LP: 1. Get the widget 'avatarBadge' from adapter
12 const { button, avatarBadge } = this.adapter.exports
13 // LP end
14 const { $ } = this.adapter.attachConfig({
15 POST: (ctx) => [
16 button({
17 DEFAULT: {
18 label: 'GOLD',
19 img: EXAMPLE_IMG,
20 // LP: 3. Toggle the state “hidden/shown” of the "avatarBadge" widget on button click
21 exec: () => {
22 $(ctx, 'badge').hidden = !$(ctx, 'badge').hidden
23 },
24 // LP end
25 },
26 }),
27 // LP: 2. Add extra "avatarBadge" widget and make it hidden by default
28 avatarBadge({
29 id: 'badge',
30 initial: 'DEFAULT',
31 DEFAULT: {
32 img: BADGE_IMG,
33 vertical: 'bottom',
34 horizontal: 'right',
35 hidden: true,
36 exec: () => console.log(ctx),
37 },
38 }),
39 // LP end
40 ],
41 })
42 }
43}

Here is the result code of the example: ex03-widgets-interaction-solution.

Run the dapplet:

npm i
npm start

In the browser:

video

If you don't know how to run a dapplet in your browser, see Get Started.